Any other #Bambu #3DPrinter users having issues with new Bambu basic pla filament spools tangling in the first few metres of filament. It's like the filament doesn't unspool properly, and then jams, digging into the rest of the filament on the spool. I've had it happen with several different colours in the last few weeks.
Recent searches
Search options
#making
Today was a really good day. I 3d printed some jigs to make this project easier. I did the cuts on the mill. Remade a part on the lathe that I scrapped after getting my centre finding mixed up on the mill. Confirmed my design works using the 3d printed jig. Then used the mill to make some improvements to a previous project (collet chuck). 3d printed a load of parts for a makerspace community project. And started the lathe work on Next Project.
Was a good day.
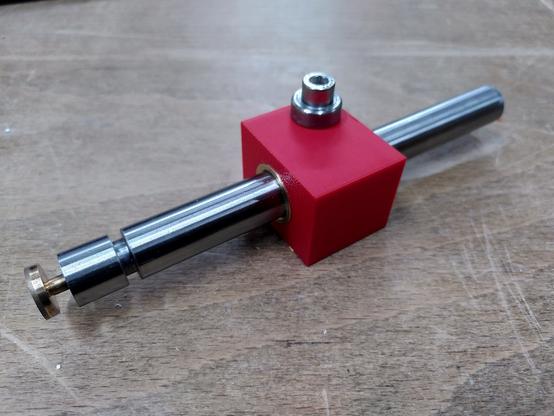
To test that everything works before I commit to wood. I printed up a test jig. It needed a little refinement to open up the bores (3d printing is not perfect for dimensions, esp of circles). But then. I could test fit everything.
And it works.
It works better than I ever dreamed it would. The bar in the image slides easily, but with just a quarter turn of the bolt. It locks on place. A quarter turn is all it takes. From free moving to locked. Now I need to buy the wood.
And that's all the metal machining for this project done. It works! It bloody well works!!!
Amazingly the jig I made to help manufacturer worked brilliantly. I'm so pleased.
Intentionally Making Close Friends (2021)
https://www.neelnanda.io/blog/43-making-friends
#HackerNews #Intentionally #Making #Close #Friends #2021 #MakingFriends #SocialConnections #FriendshipBuilding #PersonalGrowth
Currently if I want to print custom cards for an RPG or board game I just use my home printer and a guillotine, and it's slow and inaccurate.
Is there a way to automate this process short of getting a full die-cutting machine (like a cricut)? It seems like overkill just to cut out rectangles of paper.
Sphynx Cat Cartoon https://m.crealitycloud.com/en/model-details/65a57fcf9c55f6f3b8bb2333
€€€ 20% Off all models €€€
#crealitycloud #3dprinting #3dartwork #3dprinted #3DModel #stl #cults3d #sculpture #making #collectibles #miniature #3dartist #fantasy #darkfantasy #toy #art
"In creating, the only hard thing is to begin: a grass blade's no easier to make than an oak." -James Russell Lowell
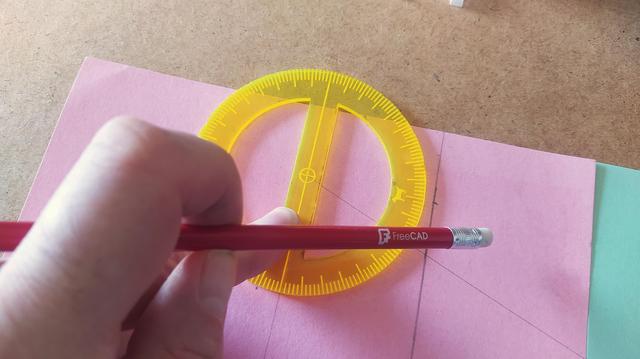
It might be Cardboard Aided Design #CAD I am undertaking, but I'm using my @FreeCAD pencil and a protractor I drew myself in @inkscape and lasercut so I still get tech points! #making #opensource
After I finished work on my primary project yesterday afternoon, I had a bit of time left until the 3d print finished. So I decided to have a play with my new self made sensitive drilling attachment.
Aim was to drill a 0.5mm hole in some brass.
I achieved that with minimal breakage. I've just had a chance to test the hole with gauge pins.
500µm pin fits.
600µm doesn't git.
I'm considering that a big win.
Made bias tape for the first time (on the straight because will be using it on a single non-curving edge) and .. it was ok?
Less difficult than I imagined but also more boring?
Every time I use the iron for sewing I forget that 'pressing' is not 'ironing'.
Image: 2 strips of cream coloured bias tape with folded sides down, on a green cutting mat with centimeter number markings.
Metal Bias tape maker with number 18 is alongside strips.
Do not underestimate the usefulness of a pencil in the machine shop...
Visit to Exeter Pi Jam - April
https://personaljournal.ca/paulsutton/visit-to-exeter-pi-jam-april

Hello, and welcome to #MakersHour.
Five questions will be presented at 12 minute intervals between 8pm and 9pm on Thursday evenings each week, UK time.
It us a great opportunity for sharing and discussion with ither makers and creative folks, even if you don't wish to respond to the questions set.
The questions will be listed in advance each morning from Monday to Thursday at 10am UK time for advanced consideration and preparation.
Please use the # tag #MakersHour, and also tag this account, @MakersHour, and also @makershour@a.gup.pe, the boost bot, in your responses.
We are always looking for new questions encompassing #Making, #Crafting, #Creativity, etc. and you can submit yours using the # tag #MakersHourBank.
Thank you.
So the lesson we learn from that mess, is do not leave the wash tank from your resin printer setup next to the window. Even if it's a north facing window. There's enough stray UV to cause some of the resin in the IPA to cure. And then cleaning the tank becomes a right mess.
Also I think next time I want to use a respirator with full organic fumes filtering and not just a P3 filter.
Captain Archibald Haddock • 3MF files
Download 3D print model: https://cults3d.com/:2746459
Designed by @Bacterio_Desing3d
@cults3d #3DPrinting #3DPrinter #Printable #STLfile #3dartwork #3dprinted #3DModel #stl #cults3d #making #collectibles #3dartist #fantasy #toy @cults3d
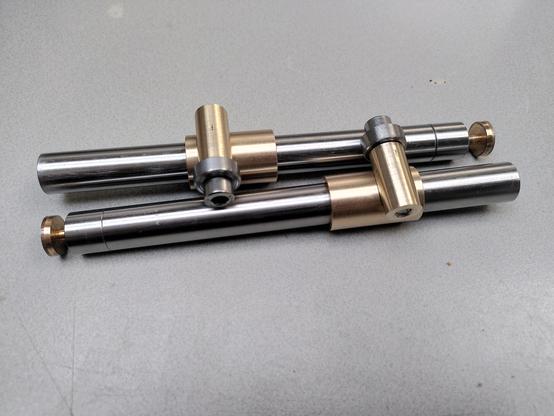
Today's parts. There's 80mm deep 10mm hole in the far ends. Tolerance is such that the 10mm shoulder on the end of the second bar, makes a delightful popping sound when pulled out of the first bar. They aren't actually supposed to go together like that. But hey.
Now I have one more pair of bronze parts to make, and then that's all the lathe work done.

